Skip to content
×
Support Us
Sign in or register for your free account
Messages
Post a Listing
Your Listings
Your Profile
Your Subscriptions
Your Likes
Your Business
Support Local News
Payment History
Sign Out
Registered Users
Already have an account?
Sign in
New Users
Create a free account.
Register
Support Local News
Sign up for Daily Headlines
Sign up for Notifications
Contact Us
Home
News
Local News
In the Community
BC News
National News
World News
Real Estate News
Business Wire
Local Sports
National Sports
Animal Stories
Digital Edition
Opinion
Opinion
Send us a letter
Arts & Life
Local Arts
Living
Driving
Food
Features
Readers Choice
Weatherhood
Crossword
Gas Prices
Public Notices
Special Print Features
North Shore Homes
Sponsored Content
Spotlight
Curated
Explore the Shore
Best Bites of the Shore
Homes
Events
Classifieds
View Classified Ads
Place a Classified Ad
Obituaries
View Legacy Obituaries
View Local Obituaries
Place an Obituary
Connect
Contact Us
Daily Headlines Email
Support Local News
Search Type
Site
Listings
Directory
Search
Home
Local News
Gallery: Relay for Life
Jun 11, 2012 1:00 AM
Share by Email
Share on Facebook
Share on X
Share on LinkedIn
Print
Share via Text Message
Previous
Next
1
/
1
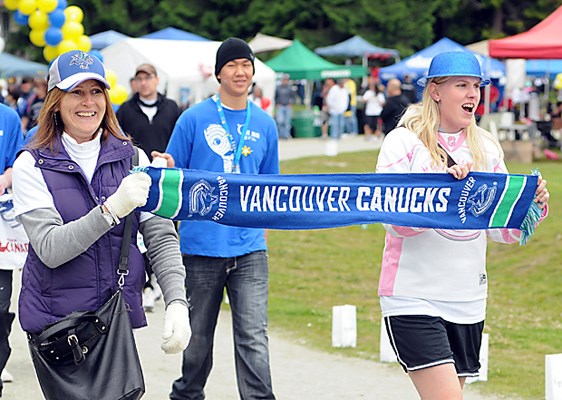
Sandra Buckley and daughter Cassandra support the Canucks as they complete a lap at the Relay For Life at Mahon park.
News Photo
Advertisement
Reader Feedback
Sort
Oldest
Newest
Show
This has been shared
0
times
0
Shares
Share by Email
Share on Facebook
Share on X
Share on LinkedIn
Print
Share via Text Message
More Local News
North Vancouver man gets mom's Lamborghini towed for speeding
Aug 26, 2025 11:23 AM
Soundtrack for September: Your ultimate guide to Vancouver concerts next month
Aug 26, 2025 10:45 AM
Update: Power restored for 4,700 customers in Central Lonsdale
Aug 26, 2025 9:56 AM
Featured Flyer