Not long ago, we encountered a few plumbing issues that needed to be addressed under our kitchen sink.
When I emptied out the cupboard space I noticed the bottom surface was in dire need of some cleaning up. Over the years I've wiped down the wood surface and recently noticed it was becoming stained and retaining moisture damage.
When I was last in Home Depot I came across 12x12-inch, self-adhesive linoleum tiles and thought they would work nicely for protecting the underside of my kitchen sink. They retailed for $0.93 each and were found in the carpeting and flooring section of the store.
I have seen this idea done in workspaces and garage cupboards. After speaking with a sales representative, I discovered it only takes minutes to get the project done.
Look for self-sticking linoleum tiles at your local hardware store. These tiles come in a variety of different colours to match your home's decor.
Measure the space below your sink and determine the square footage of tiles required to fit. For this project, you'll require a tape measure, wallpaper roller, box cutter (or razor blade), and possibly a primer.
Experts recommend a primer if the adhesive on the back of the tile doesn't stick properly to the targeted surface. The best way to see if your surface is suitable is to cut a small sample and apply it. For small projects such as this, the self-adhesive usually does the job, but for larger projects you may want to consider priming the area first. This is especially true for concrete and plywood surfaces.
Clean the area with soap and water, and let dry thoroughly before applying the self-adhesive tiles.
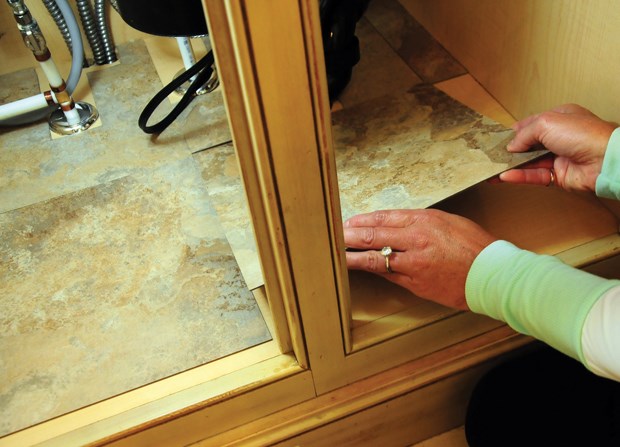
If you have pipes and tubes under your sink, as we did, you'll have to cut the tiles to fit around these obstructions with your box cutter.
If you plan on matching the grain on the tiles, look for arrows on the backs indicating grain direction. Arrange the tiles with all of the arrows pointing the same way if that is the look you desire.
Once you're happy with the position of your tile, press it firmly against the surface and roll over it with a wallpaper roller.
Be sure to fit the tiles very closely against each other, ensuring a tight fit.
Barb Lunter is a freelance writer with a passion for home decor, entertaining and floral design. [email protected] lunter.ca


