As Christmas inches closer, it’s likely you may be less inclined to take on the task of homemade decorations.
“At the beginning of the season they’re (customers) very happy to make their own. By mid-December they’re going, ‘I’m just going to buy it,’” says Kelly Milligan with a laugh.
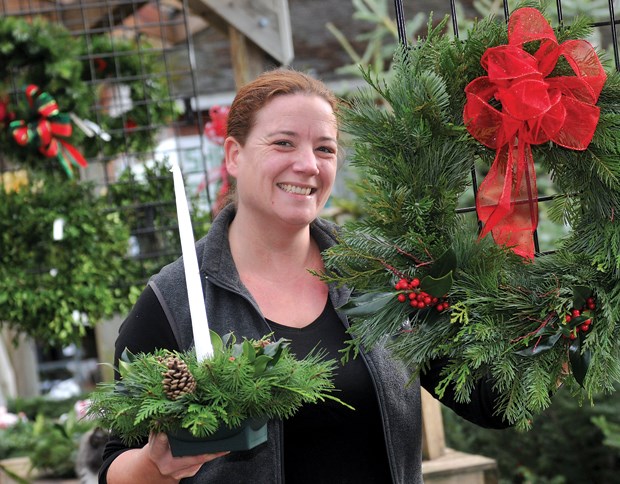
Milligan is a manager at Dykhof Nurseries and Florist in North Vancouver, and each year she helps dozens of crafty people make their own wreaths during workshops held at the store.
This year she hosted five workshops and they were all full. Although the workshops are done for the season, Milligan says making a wreath at home is not hard to do. A beginner starting from scratch can finish a wreath in about an hour, she notes.
Fir, pine, and cedar are the three main greens used for wreaths at this time of year. Milligan explains the following basic steps involved in putting a wreath together.
Start with a wire wreath frame (14 inches is the most popular size).
Stuff the frame with hay or moss and wrap it in plastic or twine. The stuffing gives the wreath depth and fullness so it has a nice, round shape instead of sitting flat, explains Milligan.
Once the frame is stuffed and wrapped, greenery is added using waxed string. Make a mini bouquet (about six branches) out of the greenery and tie it to the wreath frame using the waxed string. If you’re using a mix of greens (such as fir, pine, and cedar), you can add a couple of branches of each type of green to the mini bouquet.
Then make a second bouquet and tie it on so that it overlaps where you tied the first one and covers the string and branches from the previous batch.
Repeat that step until the wreath frame is completely covered.
“It just works its way around in a nice uniform circle,” says Milligan.
Add extras (such as huckleberry branches) as you go along. Milligan says you can poke them in after you’re done the wreath, but they will stay in better if you tie them as you go.
Once your wreath is made, it can last indoors for about two weeks and should be misted with water regularly, and taken outside every once in a while to refresh it.
If the wreath is outside, it will last longer.
“If you leave them outside they’ll last you well into the new year,” says Milligan, adding it depends on the weather. If it warms up they won’t last as long.
She says she has had workshop participants whose wreaths were still up at Easter so they took out the holly and put in Easter eggs.
Wreath-making can be a fun project for parents and kids to do together, but Milligan recommends the activity for kids who are at least 12 years old, noting that “it gets a little finger tricky,” and may be hard for younger kids to do.
Wreaths help bring holiday sights and smells to a home and Milligan notes, “It just adds a nice little Christmas touch to your door.”
Another way to add fresh greenery to your holiday decorations is to make your own centerpiece. Milligan uses mostly the same greenery for centerpieces that she uses for wreaths, but also adds holly, berries, and pine cones.
You can also add eucalyptus branches for a bit of silvery grey colour, she notes, adding rose hips are also popular for centerpieces.
Rose hips are similar to a holly berry but bigger and without leaves.
“They’ve got that nice, red colour,” says Milligan.
The greens will last for a while and then closer to Christmas you can add in some carnations or roses, she explains.
Making your own centerpiece starts with something called a wet floral foam (available at florists, and garden and craft stores). The floral foam is soaked in water and retains moisture. Greenery is added to the foam base and soaks up the moisture from it.
The block of floral foam should be placed in a centerpiece dish that sits low so the greenery hides the bowl.
Centrepieces can also be placed in decorative pots or long vases, as long as it’s shallow, notes Milligan.
Once the floral foam is ready, poke in some branches to indicate the width and height of your centerpiece.
“The easiest thing to do is work your structure first, so work your edges and your height,” explains Milligan.
Make a base of greenery using fir, pine, cedar, or a combination of all three.
“To get your base I find fir works well because it’s nice and full and it’s a little bit more rigid, so it gives you your structure,” suggests Milligan.
Pine adds some puff to the piece, and cedar has a flowing characteristic that drapes the centerpiece nicely, she adds.

