I think we can safely say that we no longer have to rely on the Paas Easter egg kit when it comes to decorating our eggs for Easter.
Today, there are many different ways to decorate the Easter egg and most kids enjoy the decoration process as much as the hunt for chocolate.
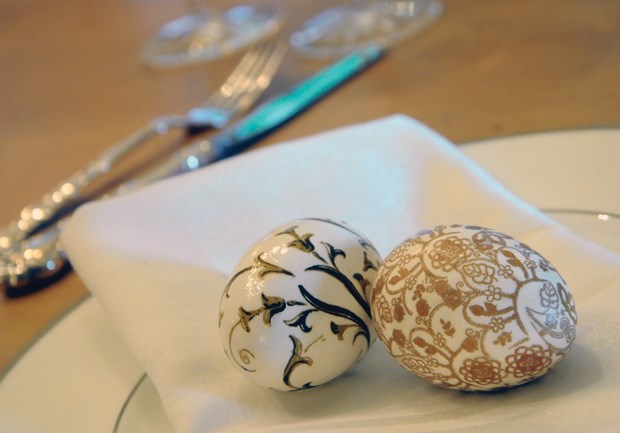
The egg has always been the symbol of new life in many cultures and religions. In Eastern Europe they are referred to as "pisanki." There are many ways to decorate the eggs and one of the more popular methods is decoupage. They may take a little more time than the traditional egg dunk, however, they are definitely worth it.
Add pretty spring flair to your home this year with these easy-to-make Easter eggs.
This decoupage method involves decorating the surface of the egg with cocktail napkin cutouts. They are finished off with a decoupage gloss glue. Martha Stewart Multi-Surface Durable Gloss Finish Decoupage glue is recommended for this particular craft.
For best results, it is important to source out pretty, decorative napkins containing the correct kind of design and size for your egg. Ideally, the napkin design should be on a white background and in small print. Dollar stores offer a wide variety of napkins suitable for this idea so you are able to personalize each and every egg to the recipient or for yourself.
The eggs must first be blown out and dried. However, plastic eggs from the craft stores work beautifully for this idea. The plastic eggs will last for several years while the blown out, real eggs will also last for years if properly stored in hard case boxes.
For directions on how to blow out your eggs, it's best to source out a tutorial on the Internet. The egg blowing process can be a bit tricky so I recommend trying a few before you get started.
I found the plastic eggs work just as nicely and save a lot of time.
Once your eggs are completely dry, peel away the layers of cocktail napkin until you are left with the top layer only. This is the layer you will work with. Begin to cut out tiny pieces of the patterns on your napkins. You can leave a little of the white edges as the glue will blend them into the egg's surface. Using a paintbrush, carefully cover the surface of the egg with glue and begin to attach your pre-cut pieces of napkin to the egg. Be sure to even out any wrinkles in the napkin piece. Once the egg is completely covered, apply a final coat of glue over the entire egg and let it dry.
These Easter eggs make lovely gifts and I guarantee you that once you get started you will be addicted and make many for your friends and family. Happy Easter!
Barb Lunter is a freelance writer with a passion for home decor, entertaining and floral design. She also runs Blu Dog Staging Redesign. bludogstagingandredesign.com